Table of Contents
What is Secure Boot?
Secure Boot enhances system security, and protects against Secure Boot is a crucial security feature included in modern computer systems, including Windows 11, Windows 10, and some Linux distributions. Its primary purpose is to protect your computer from malware by ensuring that only trusted software can run during the system startup process.
How Secure Boot Works
- Verification of Software Authenticity:
- When Secure-Boot is enabled, the computer verifies the digital signature of any executable files before allowing them to run.
- This verification process ensures that the software has not been tampered with and comes from a trusted source.
- By doing so, it prevents viruses and other malicious software from executing on the system.
- Digital Signatures and Certificate Authorities:
- To be signed, a piece of software (such as the operating system) must be submitted to a certificate authority.
- The certificate authority verifies that the software is from a trusted source and has not been altered.
- Once verified, the software receives a digital signature from the certificate authority
- Running Signed Software:
- On a system with Secure-Boot enabled, only software with valid digital signatures can run.
- When the system attempts to execute software, it checks the digital signature for validity.
- If the signature is not valid, the system blocks the software from running.
Why Use Secure Boot?
- Enhanced Security: By allowing only signed software, you ensure that the software is trustworthy and hasn’t been compromised.
- Multi-Layered Approach: Secure-Boot complements other security features like data encryption and intrusion detection.
Considerations:
- Disabling Secure Boot: If you need to run unsigned software, you can disable Secure Boot in the BIOS settings.
- Dual-Booting: Secure-Boot may complicate dual-boot setups; you’ll need to disable it and use an alternative bootloader if necessary.
What is the use of Secure Boot in Gaming?
Secure Boot plays a crucial role in gaming, especially when it comes to maintaining system security and ensuring a safe gaming environment. Here’s how it impacts gaming:
- Anti-Cheat Software Compatibility:
- Many online games, including popular titles like Valorant, use anti-cheat software to prevent cheating and maintain fair gameplay.
- Secure-Boot ensures that only trusted and signed software runs during system startup. This is essential for anti-cheat tools like Vanguard (used by Valorant) to function properly.
- Without Secure Boot, anti-cheat systems might not recognize your PC as a trusted platform, leading to errors and potential game restrictions.
- Protection Against Malware:
- Gaming PCs are susceptible to malware and unauthorized modifications.
- Secure Boot prevents unauthorized bootloaders and rootkits from executing during startup
- By enforcing digital signatures, it ensures that only legitimate and trusted software runs, reducing the risk of malware affecting your gaming experience.
- System Integrity:
- When you play games, your system interacts with various components, including drivers, game files, and network services.
- Secure Boot helps maintain the integrity of these components by preventing unauthorized modifications.
- Tampering with critical system files can lead to crashes, performance issues, or security vulnerabilities.
- Preventing Unauthorized Modifications:
- Some games and gaming platforms (like Steam) rely on system files and libraries.
- Secure-Boot prevents unauthorized changes to these files, ensuring that game installations remain intact and unaltered.
- It also protects against unauthorized modifications to game executables.
- Hardware-Level Security:
- Secure-Boot operates at the hardware level, making it difficult for attackers to bypass.
- It ensures that the operating system and drivers load securely, minimizing vulnerabilities that could impact gaming performance.
Malware, and ensures compatibility with anti-cheat software, all of which contribute to a better gaming experience. Enabling it is recommended for gamers who want a secure and stable gaming environment.
How to enable Secure Boot?
Step 1:-
- If the system is powered on then restart the system and press F2 or Fn+F2 continuously then the system goes to the BIOS menu/bios setup utility.
- If the system is not powered on then Press the power button key and then press F2 or Fn+F2 continuously then the system goes to the BIOS menu/bios setup utility.
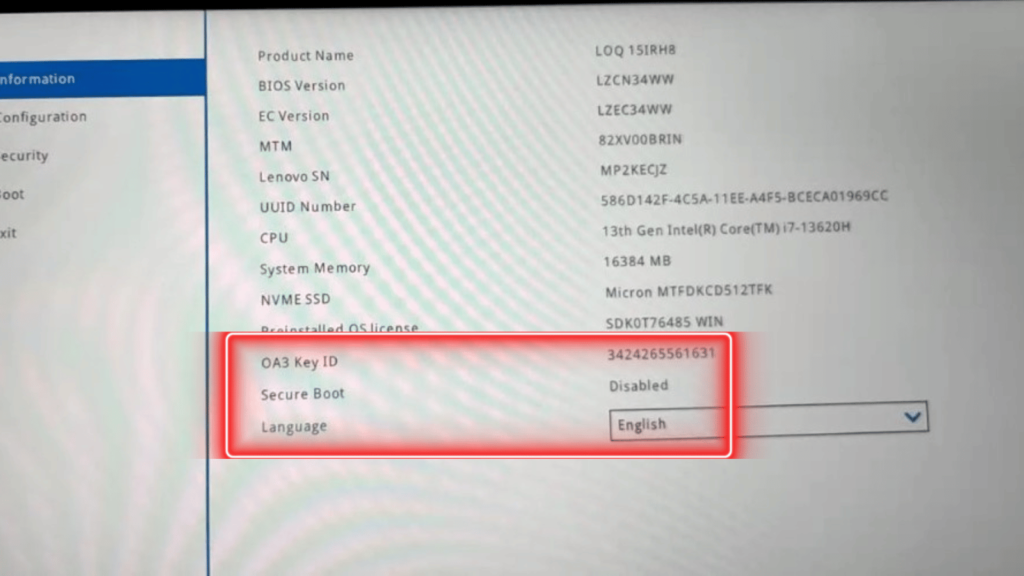
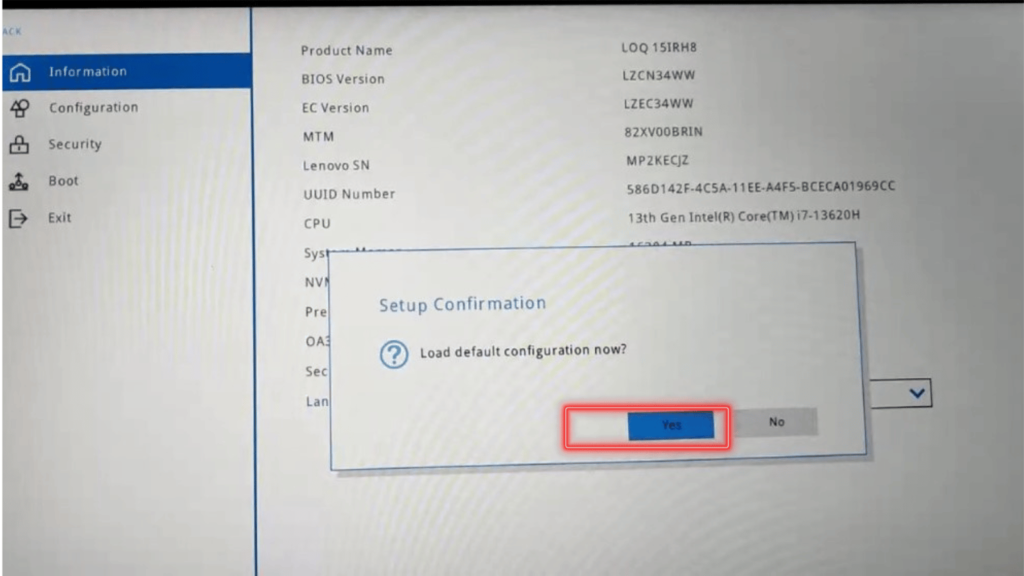
Step 2:- Load default (Press F9 or Fn+F9 then Click yes)
Step 3:- Save and Exit (Press F10 or Fn+F10 then Click yes)
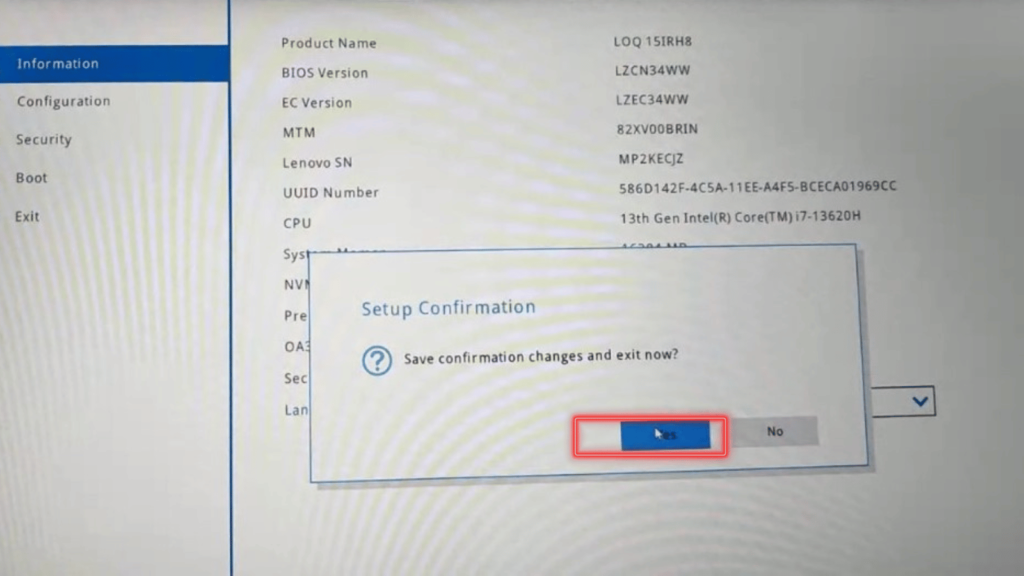
Step 4:- After clicking yes then the system automatically powers on.
Step 5:- Again Restart the system and press F2 or Fn+F2 continuously then the system goes to the BIOS menu/bios setup utility.
Go to the security option > Restore Factory keys > Press Enter
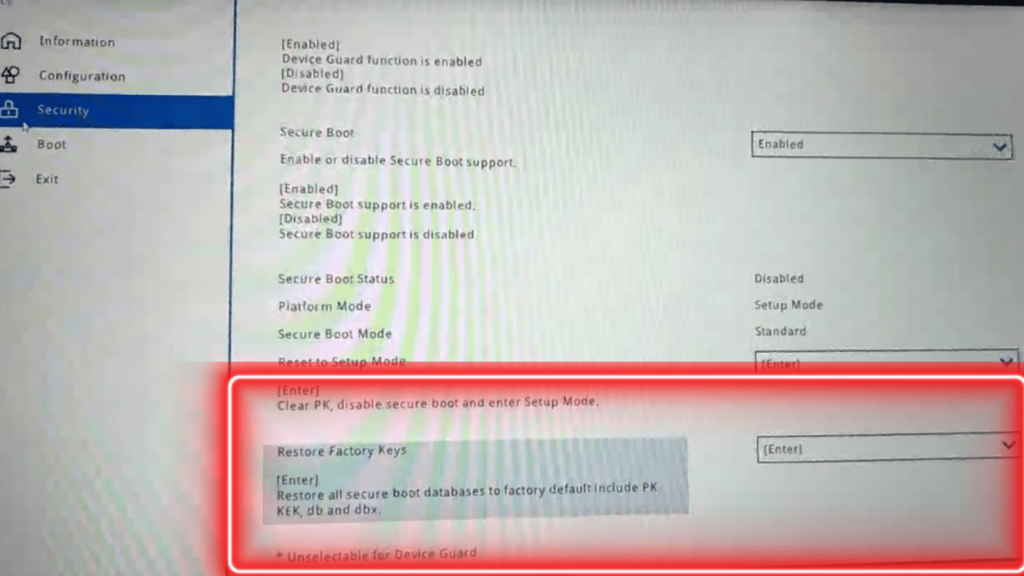
Step 6:- Press F10 or Fn+F10 then Click yes

Now the system automatically powers on Go to system information and checks secure boot enabled.
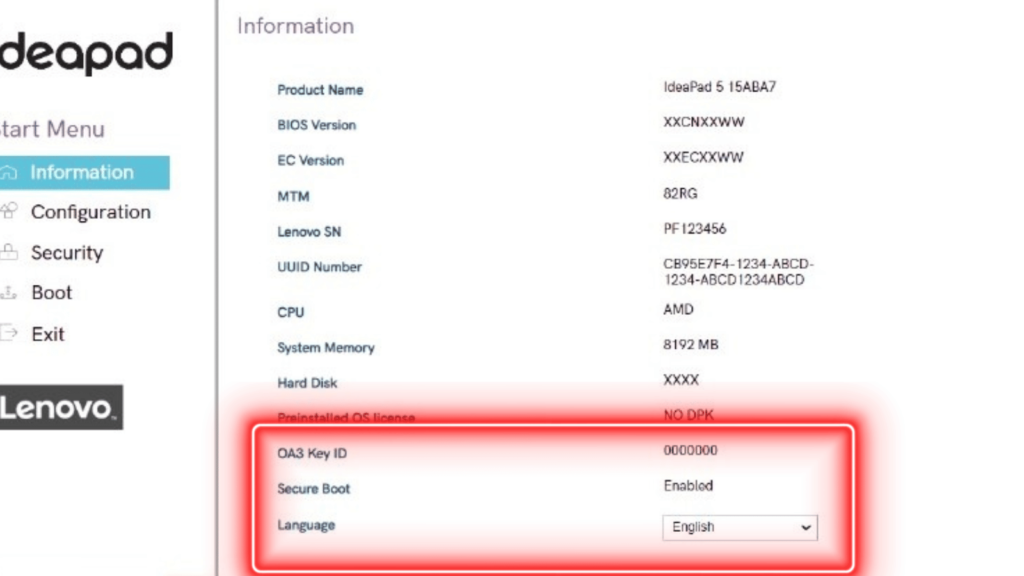
How to Disable Secure Boot?
Step 1:-
- If the system is powered on then restart the system and press F2 or Fn+F2 continuously then the system goes to the BIOS menu/bios setup utility.
- If the system is not powered on then Press the power button key and then press F2 or Fn+F2 continuously then the system goes to the BIOS menu/bios setup utility.

Step 2:- Go to the [Security] tab > [Default Secure boot on] and set as [Disabled].
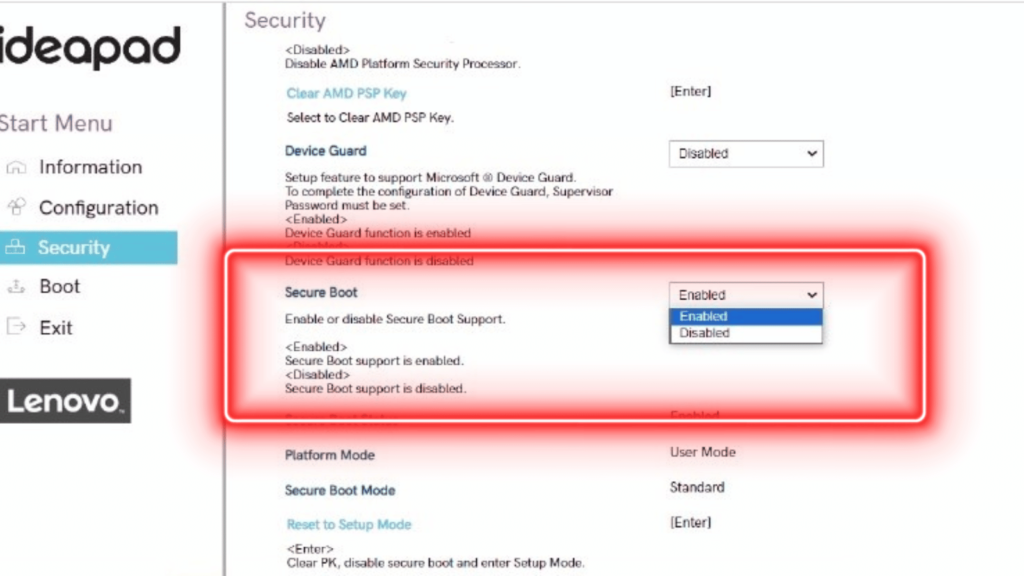
Step 3:- Now Secure_Boot – Disabled

How to Go BIOS Setup Utility in Windows 10 / Windows 11
Shortcut key of BIOS Setup Utility:-
| Acer | F2 or DEL |
| ASUS | F2 for all PCs, F2 or DEL for motherboards |
| Dell | F2 or F12 |
| HP | ESC or F10 |
| Lenovo (Laptop) | F2 or Fn + F2 |
| Lenovo (Desktops)/(All-in-one) | F1 or Fn + F1 |
| Lenovo (ThinkPads) | Enter + F1 |


